The Best Lighting Equipment for Photography A Complete Guide
If you ask ten photographers what the best lighting equipment for photography is, you’ll likely get ten different answers. The truth is, it completely depends on what you’re shooting. For studio work, powerful strobes and large modifiers are king. For on-the-go shoots, it’s all about portable speedlights or battery-powered LEDs.
Your choice boils down to your specific needs, whether you're freezing action with a powerful burst of flash or creating soft, beautiful, continuous light for video.
Why Mastering Light Is Your Most Important Skill
The single biggest thing that separates a quick snapshot from a professional photograph is the intentional use of light. Think about it: your camera can only capture the light that's already there. Lighting equipment gives you the power to create that light from scratch and bend it to your will.
Let's use an analogy. Imagine you're a painter. Your light sources—a big studio strobe or a small speedlight—are your tubes of paint. The light modifiers, like softboxes and umbrellas, are your brushes. A painter wouldn't use the same brush for every single stroke, and a photographer uses different modifiers to shape a raw, harsh light source into something soft, dramatic, or flattering.
Building Your Lighting Foundation
This guide is here to cut through the confusing technical jargon and help you pick the right tools for the job. We'll walk through the core pieces of gear and what they're actually used for, so you can build a kit that makes sense for you.
Here’s a sneak peek at what we'll cover:
- Core Lighting Tools: A straightforward look at strobes, speedlights, and continuous LEDs.
- Essential Modifiers: How to use softboxes, umbrellas, and reflectors to shape your light.
- Practical Applications: Real-world advice for portraits, product shots, and events.
The real goal is to get you past just owning the gear and into truly mastering it. Of course, sometimes you'll be working with the sun as your only light source. Understanding how to use natural light is just as critical, and you can learn more by checking out our guide on the best time of day for outdoor photography.
Light is the language of photography. Once you learn to speak it fluently, you can tell any story you want. You gain complete creative control over the final image's mood, depth, and impact.
This skill is more valuable now than ever. The photography lighting equipment market hit $5.15 billion in 2024 and is expected to keep climbing, largely because high-quality lighting is no longer optional for content creators. You can dig into the numbers and this growing market and its trends if you're curious.
By the time you finish this guide, you won't see light as a problem to be solved, but as your most powerful creative tool.
Understanding the Core Types of Photography Lights
Before you can pick the right lighting gear, you have to know the main players on the field. Think of it like a chef’s kitchen—you wouldn't use a cleaver for delicate slicing. For photographers, our essential tools are strobes, speedlights, and continuous lights, and each one "paints" with light in a completely different way.
Getting a feel for these differences is your first big step toward mastering your images. It’s the line between accepting the light you’re given and creating the exact mood you have in your head.
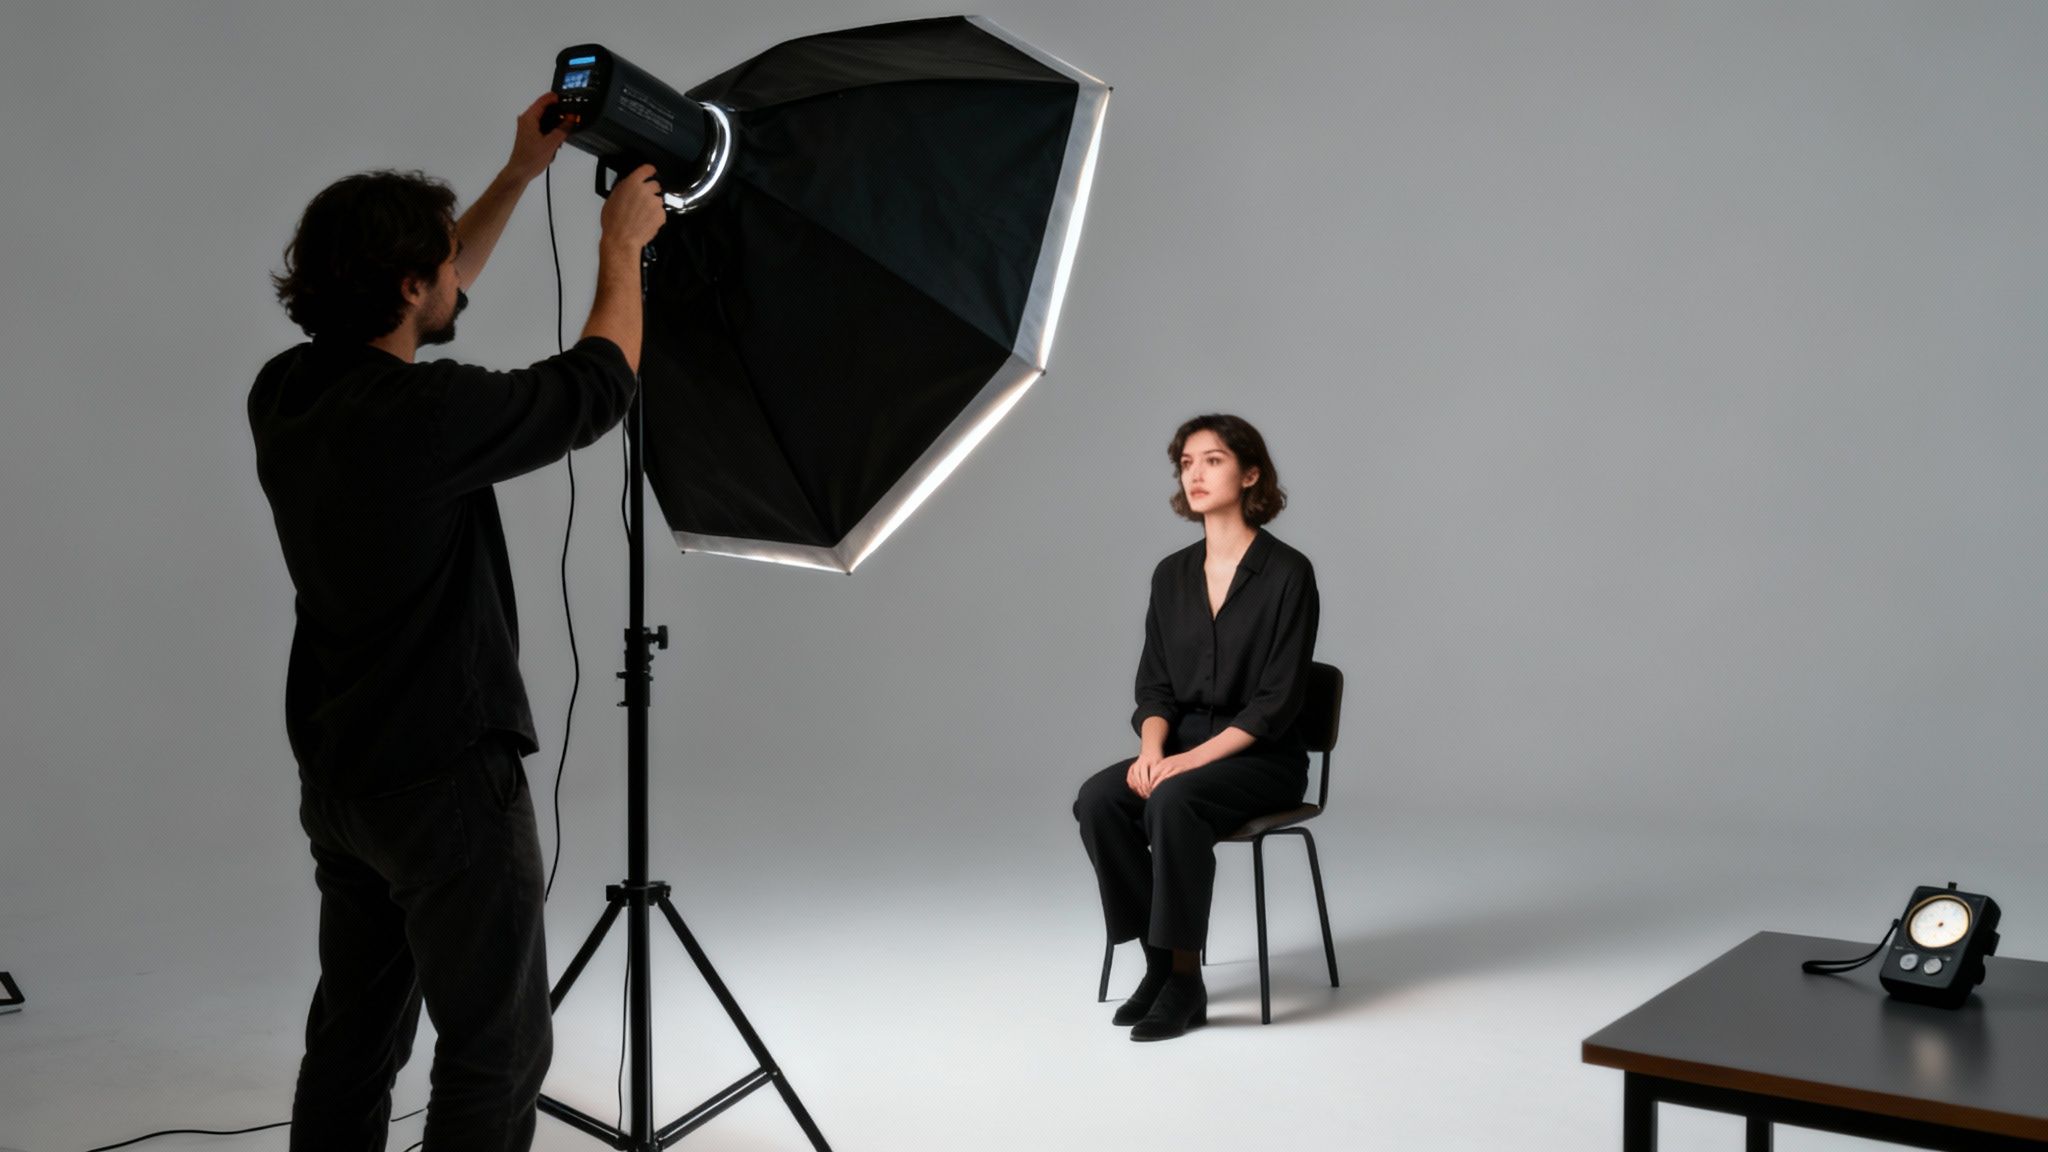
Strobes: The Studio Powerhouses
Strobes, often called monolights, are the heavy lifters of the photography world. Picture a bolt of lightning—a massive, instantaneous burst of intense light that freezes absolutely everything. That’s a strobe in a nutshell.
These units plug into a wall or use a beefy battery pack, allowing them to store and unleash a huge amount of energy in a tiny fraction of a second. This raw power is exactly what you need for studio portraits, commercial shoots, or any time you have to overpower the sun. Their job is simple: deliver a huge punch of light the very instant your shutter clicks. When you're exploring different types of lights, looking into specialty high-speed options like the Boomtone Dj LED Strobe can even open up creative avenues for capturing motion and dramatic effects.
Speedlights: The Portable Problem-Solvers
If strobes are the studio's heavy machinery, speedlights are the versatile multi-tool you can carry in your pocket. These are compact, battery-powered flashes designed for pure agility. You can slide one right onto your camera's hotshoe or, even better, place it anywhere you want for more creative control.
A speedlight is basically a go-anywhere, controlled pop of light. It won't match a studio strobe for sheer power, but its portability is a game-changer for event photographers, wedding shooters, and anyone working on location. It’s the perfect tool for adding a bit of fill light to a portrait or lighting up a dark reception hall. Getting the right one for your camera is crucial, and our guide on off-camera flash for Sony mirrorless cameras can help you navigate those specific choices.
The real choice between light types isn't about which is "better," but which is the right tool for the story you're trying to tell. A strobe freezes a moment with power, while a continuous light lets you see and shape the mood in real-time.
Continuous Lights: The WYSIWYG Champions
Unlike their flashing cousins, continuous lights just stay on, like a lamp. This "what you see is what you get" (WYSIWYG) approach is their superpower, making them incredibly intuitive and a fantastic starting point for beginners. You can see exactly how the light and shadows are hitting your subject before you ever take the photo.
This entire category has been revolutionized by LED technology. Modern LED panels are cool-running, energy-efficient, and come in all shapes and sizes. It’s no surprise that the photographic lighting equipment market was valued at $1,590 million in 2023 and is projected to keep climbing, largely thanks to these LED advancements.
Continuous lights are an absolute must for videography, but they’ve also become a favorite for still photographers in specific situations:
- Newborn Photography: No startling flashes to wake up the baby. Just a gentle, constant glow.
- Product Photography: You can dial in highlights and shadows with pinpoint precision.
- Learning to Light: They give you instant visual feedback, which massively speeds up the learning curve.
To help you decide at a glance, here’s a quick breakdown of how these three lighting types stack up against each other.
Strobe vs Speedlight vs Continuous LED: A Quick Comparison
Light Type
Primary Use Case
Power Output
Portability
Best For
Strobe
Studio Photography, Commercial
Very High
Low
Freezing action, overpowering sunlight, large sets
Speedlight
On-Location, Events, Weddings
Medium
Very High
Portability, run-and-gun shooting, fill flash
Continuous
Video, Product, Newborn, Beginner-Friendly
Low to High
Varies
Seeing light in real-time, video, sensitive subjects
Ultimately, each type of light opens up a different set of creative doors. Strobes give you overwhelming power, speedlights offer unmatched portability, and continuous lights provide intuitive, constant illumination. Grasping these core concepts is the foundation for building a lighting kit that can handle anything you throw at it.
How to Shape Light with Essential Modifiers
A powerful flash is just a starting point. The real art of lighting begins when you learn how to shape that light. A bare flash is like a harsh, uncontrolled firehose—it’s bright, but it sprays light everywhere, creating deep, unflattering shadows and specular highlights. Light modifiers are the tools that let you tame that beast.
Think of modifiers as the brushes for your light. They give you complete control over the quality, direction, and spread of your flash, which in turn fundamentally changes the mood and dimension of your photos. Learning to use them is a massive leap forward in your journey. Without them, even the most expensive strobe is just a very bright, very harsh bulb.
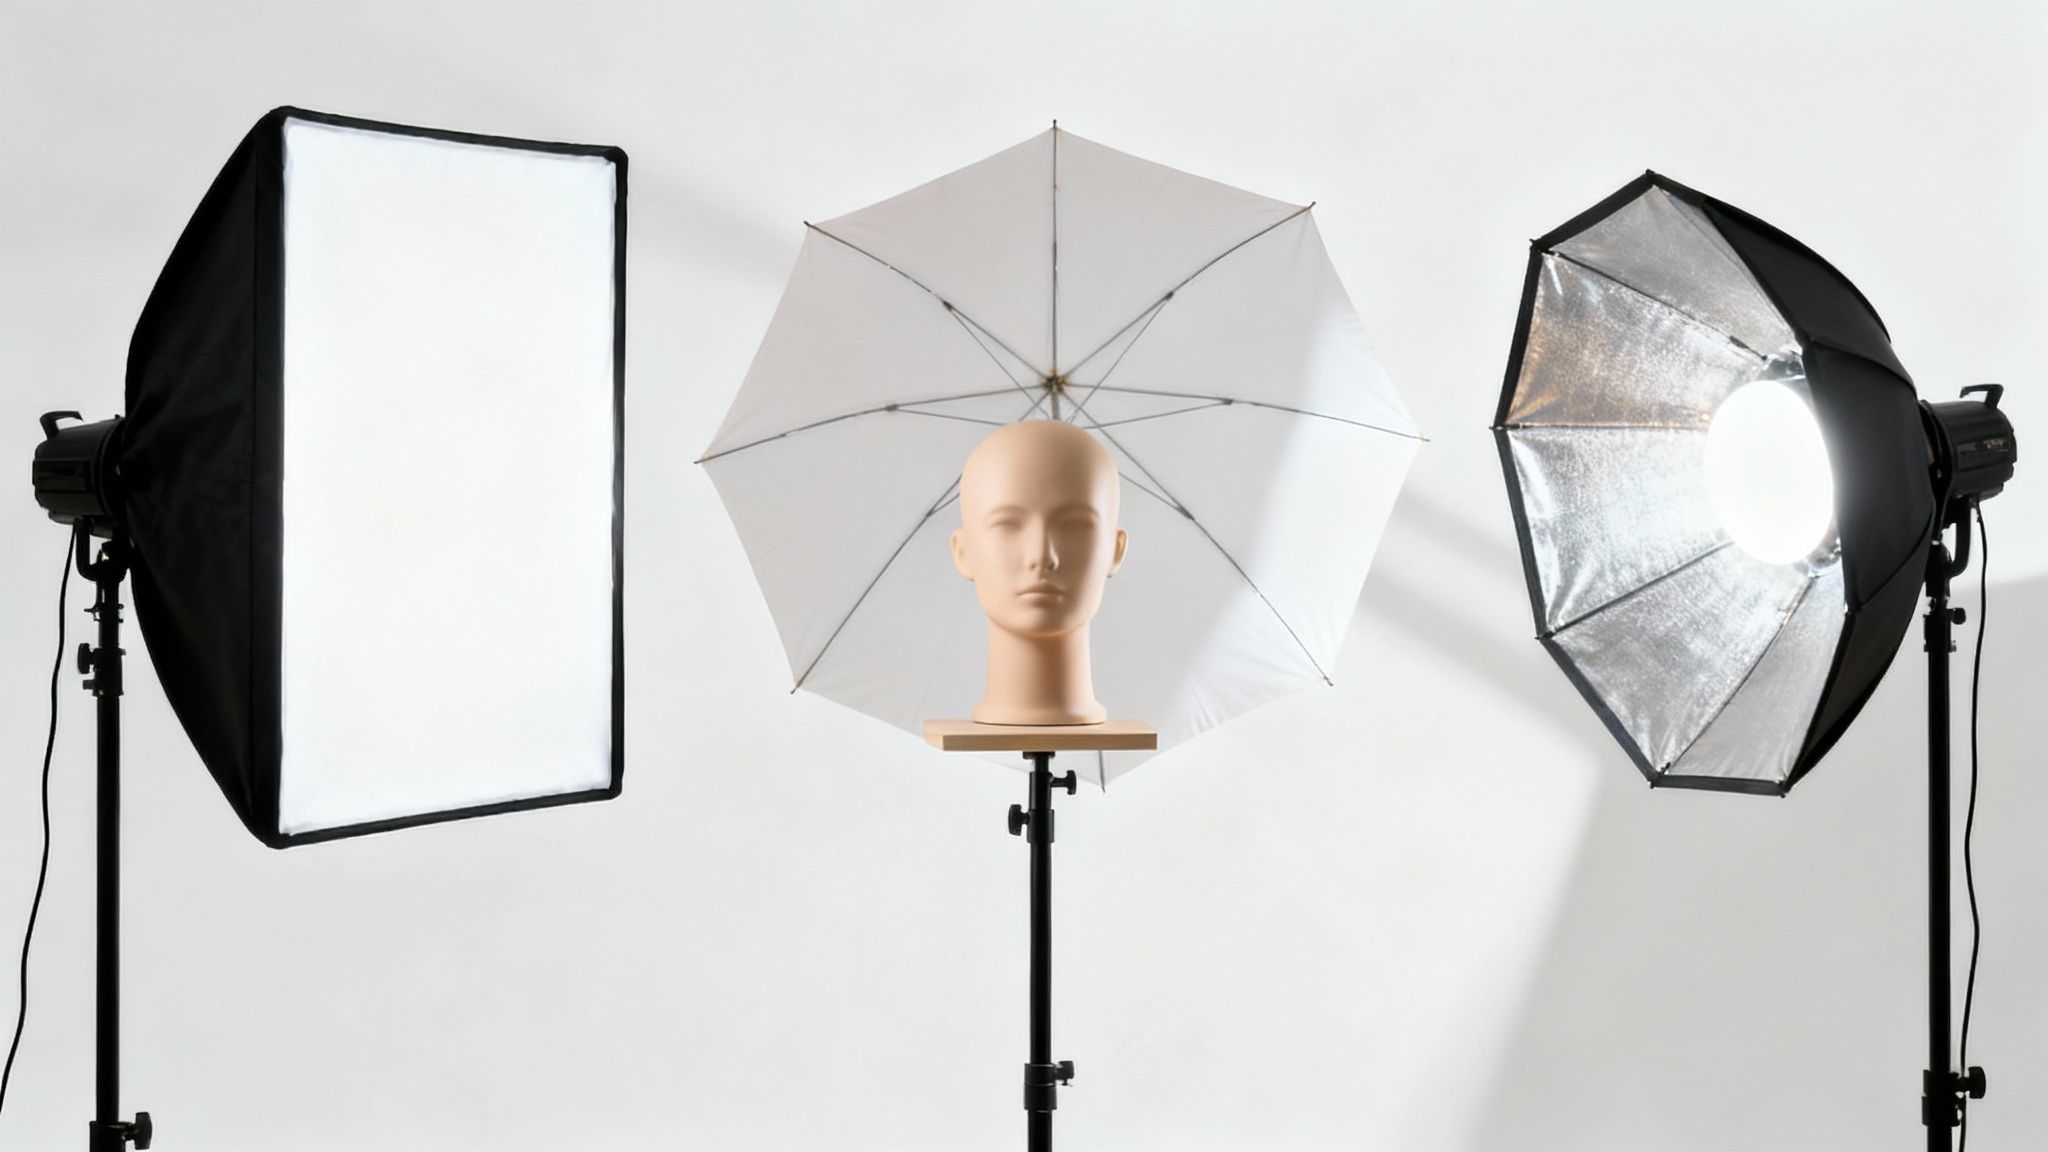
Softboxes: The Portrait Photographer's Best Friend
When you picture a classic, beautifully lit studio portrait, there's a good chance a softbox was involved. A softbox is basically a tent for your light—it has a reflective interior and a white diffusion panel on the front.
This simple design does one thing exceptionally well: it creates soft, flattering, and directional light. By making your light source effectively much larger, a softbox wraps light around your subject, which smooths skin tones and dials back harsh shadows. It’s the secret sauce for so much professional portrait work.
Softboxes come in all shapes and sizes, and each one paints with a slightly different brush:
- Octaboxes (eight-sided): These are famous for creating beautiful, round catchlights in a subject's eyes. They're a top choice for headshots for that very reason.
- Rectangular Softboxes: Great for full-body shots or even product photography, as they mimic the soft, even light you'd get from a large window.
- Strip Boxes (long and narrow): These are perfect for creating clean rim lights to separate a subject from the background or for lighting a person evenly from head to toe.
Umbrellas: The Go-To for Broad and Easy Coverage
If a softbox is all about controlled, directional light, an umbrella is about getting broad, easy coverage. They are probably the simplest and most affordable modifiers you can buy, which makes them a fantastic starting point for anyone building their first lighting kit.
Umbrellas generally work in two ways. A shoot-through umbrella, made of translucent white fabric, is placed between your light and your subject, softening the flash as it passes through. A reflective umbrella, which usually has a silver or white interior, works the other way around: you point the flash into the umbrella, and it bounces soft light back onto your subject, illuminating a large area.
The modifier you choose directly dictates the story your shadows tell. A large softbox whispers with soft, gentle transitions, while a small, hard reflector shouts with crisp, defined edges.
Beauty Dishes: Crafting Crisp and Contrast-Rich Light
The beauty dish sits in a fascinating middle ground between the feather-soft light of a softbox and the hard punch of a bare bulb. This shallow, dish-shaped reflector bounces light off a small internal plate, creating a quality of light that is somehow both soft and crisp, with more contrast and pop than an umbrella.
This signature look is highly sought after in fashion, beauty, and portrait photography because of the way it sculpts facial features. The light from a beauty dish defines cheekbones and jawlines while keeping skin texture looking great. It's a specialized tool for sure, but it delivers a specific, polished result that's hard to get any other way. A well-executed Portrait Photography Lighting Setup often has a beauty dish right at its heart.
Of course, to effectively shape your light, you'll need more than just modifiers—you need solid supports to hold everything in place. You can explore how different photography backdrops and stands can help complete your studio. Ultimately, choosing the right modifier is your first big step toward total creative control over your images.
Key Specs to Look for When Buying Lights
Shopping for new lights can feel like you’re trying to decode a secret message. Product pages are littered with acronyms and specs that, without any context, are just noise. Let's translate that technical jargon into what it actually means for your photos, so you can pick gear based on what you really need.
Think of these specs as the vital signs of a light. They tell you how powerful it is, how fast it can work, and how true its colors are. Getting a handle on these few key numbers is the first step to making a smart investment.
Power Output (Watt-Seconds)
First on the list is power output, which you'll see measured in Watt-Seconds (Ws) for strobes and speedlights. Simply put, this number tells you how much light a flash can pump out in a single burst at its highest setting.
So, why does more power matter? It buys you flexibility.
- Shooting in bright sun? A beefy strobe, something in the 400Ws range or higher, can actually overpower the sun. This is how you get those dramatic outdoor portraits with deep blue skies, even at two in the afternoon.
- Love big, soft light? Large modifiers like a 5-foot octabox eat up a surprising amount of light. Having extra power on tap ensures you still get a beautiful, bright exposure on your subject.
- Working in a big space? You’ll need that extra punch to light a large group or fill a cavernous studio without cranking your camera’s ISO into noisy territory.
A little 100Ws speedlight is a fantastic, portable tool, but a 600Ws monolight is an entirely different animal. It gives you the muscle to handle just about any situation you can throw at it.
Recycle Time
Recycle Time is just what it sounds like: how long it takes your flash to recharge for the next shot after firing at full power. You'll see it listed in seconds, often as a range like 0.1 – 1.5s. For some photographers, this is the most important spec of all.
Picture yourself shooting a wedding. The couple is walking back down the aisle, showered in confetti, and it's all over in seconds. If your flash takes 3 or 4 seconds to be ready again, you’ve already missed half the moment. For fast-paced work like events, sports, or even capturing a toddler who won’t sit still, a quick recycle time of under 1.5 seconds is non-negotiable.
On the other hand, if you're a studio portrait photographer who can ask your model to hold a pose, a slower recycle time is probably no big deal. It’s a perfect example of how the "best" gear is always about what you shoot.
Understanding the tech specs is all about matching the tool to the job. High power lets you fight the sun, fast recycling captures fleeting moments, and perfect color accuracy builds trust with clients.
Color Temperature
Color Temperature is a measurement of how warm or cool a light source is, and it's expressed in Kelvin (K). You see this everywhere in daily life. A candle flame gives off a very warm, orange-ish light (around 1900K), while the light on a cloudy day is much cooler and bluer (around 6500K).
For photography, what we crave is consistency. You want all of your lights to be singing from the same sheet music, so to speak. Most professional strobes are "daylight balanced," which means they sit right around 5600K. If you mix a 5200K light with a 6000K light, you'll get nasty color casts across your subject that are a real pain to correct later.
Color Rendering Index (CRI)
Finally, we have the Color Rendering Index (CRI). This is a simple 0-to-100 scale that tells you how accurately a light source shows the true colors of an object when compared to natural sunlight. This is a massive deal for continuous lights like LEDs.
For general photography, a CRI of 90+ is a good starting point. But in certain fields, it's mission-critical.
If you shoot products for an e-commerce brand, you absolutely cannot compromise on color. A customer who buys a "cherry red" sweater will be pretty upset if it shows up looking more like a dull orange because your lights couldn't render reds properly. This is why anyone searching for the best product photography lighting should be looking for a CRI of 95 or higher. It guarantees that what you photograph is what the customer gets, which builds trust and keeps those return rates down.
Choosing the Right Lighting for Your Photography Niche
Alright, so we've covered the different types of lights and the technical specs that actually matter. Now it's time to put it all together. The "best" lighting kit isn't about owning the most expensive gear—it’s about having the right gear for the job you’re hired to do. A wedding photographer’s needs are a world away from someone shooting products in a studio.
Let's break down some practical, niche-specific recommendations. I’ll walk you through four common photography specialties, outlining a solid starter kit for those just dipping their toes in, as well as an advanced setup for seasoned pros. Think of this as a roadmap for investing in your craft, so every piece of equipment you buy has a clear purpose.
This handy decision tree boils down the core questions you need to ask when picking your lights—it's all about speed, color accuracy, and power.
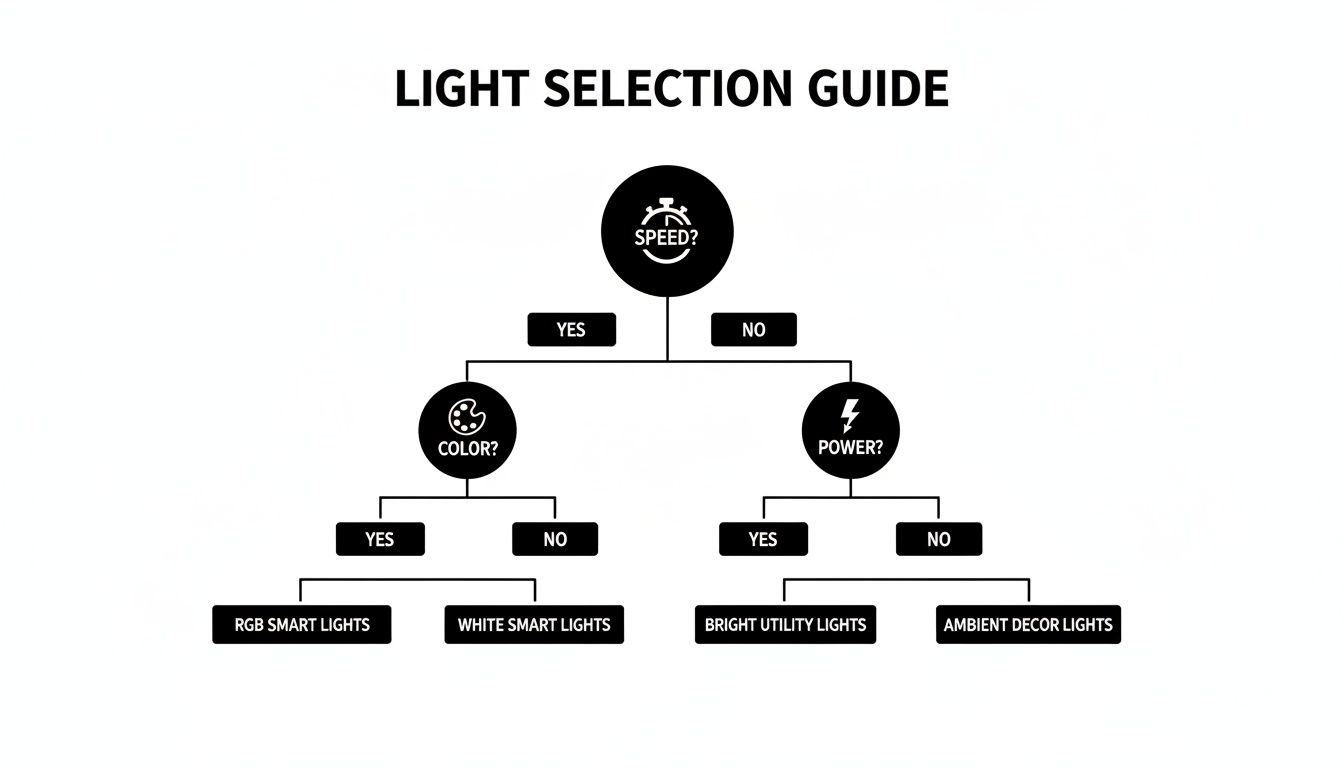
As you can see, your primary shooting style should be the first thing that guides your choices. Are you freezing motion, capturing perfect color, or just overpowering the sun? Start there.
Studio Portraiture Setups
When you're shooting portraits in a studio, control is king. You need reliable, powerful lights and large modifiers to wrap your subjects in that soft, flattering light that sculpts their features beautifully.
- Starter Kit: Honestly, you can get started with a single, beefy strobe (something around 400Ws) and a big octabox (4-5 feet). A simple one-light setup is incredibly versatile and forces you to really master the fundamentals of light. Throw in a large reflector to kick some light back into the shadows, and you've got an effective, budget-friendly kit.
- Advanced Setup: A typical professional setup grows to three lights. This usually means a powerful key light (500-600Ws) in a large softbox, a fill light (another strobe dialed down) to manage shadow depth, and a rim light with a strip box or grid to create that clean separation from the background. To really go deep on crafting the perfect portrait, check out our complete guide on the best lighting for portrait photography.
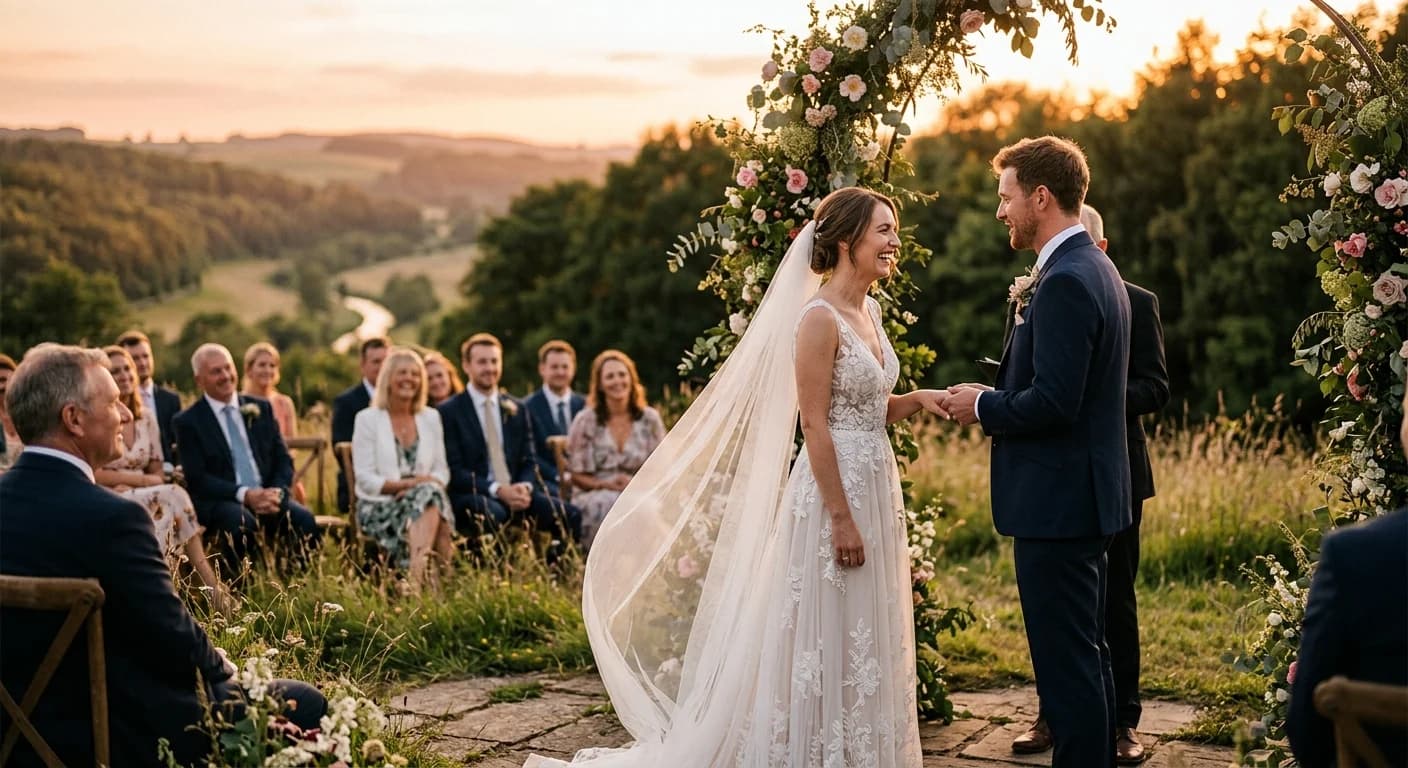
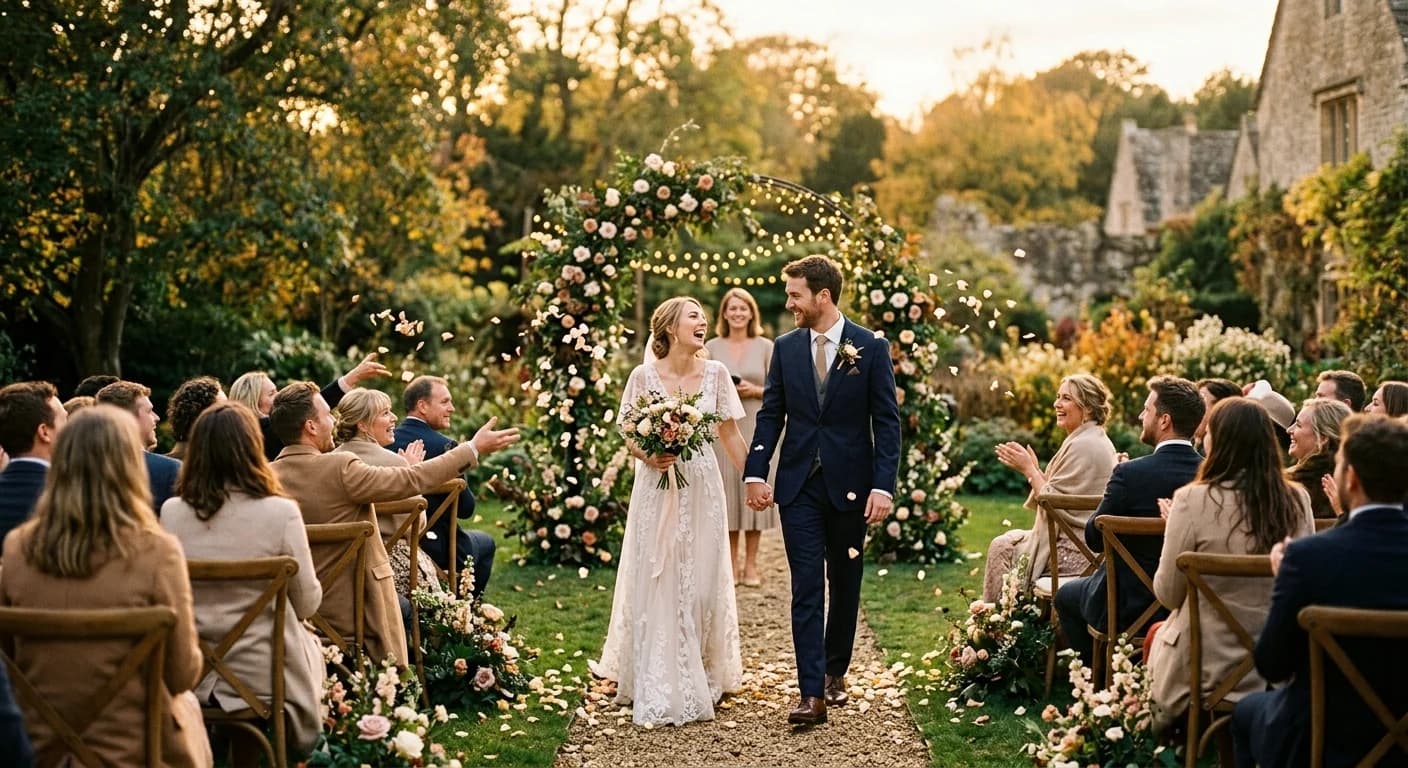
Wedding and Event Photography Gear
Wedding and event photographers are constantly on the move, so portability and speed are everything. Your gear has to be light enough to lug around all day, powerful enough to tame chaotic lighting, and fast enough to capture those fleeting moments without a second thought.
- Starter Kit: A couple of high-quality speedlights is the perfect entry point. Keep one on your camera for dynamic, run-and-gun shots during the reception, and pop the other on a light stand with a simple shoot-through umbrella for off-camera flash during portraits.
- Advanced Setup: Pros often graduate to battery-powered monolights, typically in the 200-400Ws range. These pack way more punch than a speedlight for outdoor portraits but are still completely portable. A standard wedding kit might include two of these, a couple of speedlights for backup and reception work, and compact, quick-to-assemble modifiers like foldable softboxes.
Commercial and Product Photography Essentials
In the commercial world, there's no room for error. Color accuracy and consistency are everything. Whether you're shooting for a glossy catalog or a bustling e-commerce site, the product has to look absolutely perfect and true to life.
- Starter Kit: A pair of high-CRI continuous LED lights is a fantastic choice here. The "what you see is what you get" nature of continuous light makes it incredibly easy to dial in the perfect highlights and shadows on your products.
- Advanced Setup: A high-end commercial studio will almost always use a mix of both. They'll have powerful strobes on hand to get maximum sharpness and freeze motion for things like splash shots, but they'll also rely on high-CRI LED panels for video work or any situation that demands precise, real-time lighting adjustments.
Newborn Photography Lighting
When you’re photographing newborns, nothing matters more than safety and comfort. Your lighting has to be gentle and constant, with absolutely no startling flashes or uncomfortable heat.
- Starter Kit: A single, large continuous LED light paired with a big softbox is all you really need. Place it at a 45-degree angle to the baby, and you’ll beautifully mimic the soft, gentle quality of window light. This setup is quiet, safe, and creates gorgeous results.
- Advanced Setup: A seasoned pro might use a larger primary LED panel and bring in a smaller LED or a big reflector for a touch of subtle fill. But the core principle never changes: create a soft, comfortable environment with high-quality, continuous light.
So, What's Next? Taking Control of Light
You’ve made it through the technical deep dive, and now you have a real map for navigating the world of photography lighting. The journey, of course, doesn't end when you click "buy"—it's just getting started.
Remember, the "best" gear is just a myth. The right gear is the tool that fits your vision, your subjects, and your budget. Whether you end up with a high-powered strobe or a trusty speedlight, its true power comes from your hand and your eye.
We've broken down the big three—strobes, speedlights, and continuous LEDs—and shown how each has its place. But more importantly, we've revealed that the real magic happens with modifiers. A softbox or an umbrella is what turns a harsh blast of light into something sculpted and beautiful. Think of this guide as your starting point.
Start Small, Win Big
The absolute best way to move forward is to keep it simple. Resist the urge to buy a fancy three-light kit right out of the gate. Instead, start with a single light source and learn its personality inside and out. This forces you to get intimately familiar with the fundamentals: direction, quality, and how to control shadows.
Once that first light is in your hands, play with these three variables:
- Angle: See for yourself how moving a light from the side to the front, or to the back, completely transforms the mood and adds dimension.
- Distance: Watch what happens when you bring a light closer to your subject. It gets bigger and softer, right? Now move it away and see how the shadows sharpen up.
- Diffusion: Grab a simple shoot-through umbrella or a small softbox. Pop it on your light and witness how it instantly takes the harsh edge off.
You're not just buying equipment; you're investing in your ability to shape light. Honestly, mastering a one-light setup gives you 90% of the skills you'll ever need for more complex lighting.
As you get more comfortable and your client work expands, your kit can grow with you. That second light can become your fill or a dramatic rim light. A third can separate your subject from the background. It’s all a natural progression, building one skill on top of another.
You now have the knowledge to take those first steps with confidence. Go create something amazing.
A Few Common Questions About Photography Lighting
Diving into flashes, strobes, and LEDs can feel a bit overwhelming at first. It's totally normal to have questions. Let's walk through some of the most common ones I hear from photographers building out their first lighting kit.
Do I Really Need to Spend a Fortune on Lights to Get Started?
Absolutely not. It's easy to get caught up in the gear, but you can get incredible results with just a few affordable pieces. The real goal, in the beginning, is to learn the language of light—how direction, quality, and shadows work together to create a mood.
A single, inexpensive speedlight and a simple reflector can completely change your images. Honestly, knowing how to master a simple one-light setup is far more valuable than owning a bag full of expensive strobes you don't know how to use.
The most powerful tool you have is your understanding of light. A photographer who truly knows how to shape light with one cheap flash will consistently create better images than someone who doesn't, even if they have a studio full of pro gear.
What's the Real Difference Between a Monolight and a Speedlight?
It really comes down to three things: power, portability, and how you power them. A Speedlight is that small, portable flash you often see on top of a camera. It's designed to be nimble, usually runs on AA batteries, and is a lifesaver for event photographers who need to move fast.
A Monolight, on the other hand, is a more powerful studio strobe. Think of it as the workhorse of a photo studio. It packs a much bigger punch in terms of light output, refreshes faster for the next shot, and is built for controlled environments—though many newer models are now battery-powered, which is a game-changer for on-location work. I like to think of a speedlight as a versatile multi-tool and a monolight as a heavy-duty power tool from the workshop.
Should I Go with Strobes or Continuous LEDs for Portraits?
This is a great question, and the right answer depends on how you like to work and whether video is part of your plan. Strobes have long been the go-to for portraits, and for good reason: their intense burst of light freezes motion completely, giving you incredibly sharp photos. That high power also lets you easily overpower bright sunlight for dramatic outdoor portraits.
Continuous LEDs, however, are amazing for learning. You see exactly what you're doing in real-time. This "what you see is what you get" approach makes it so much easier to understand how moving a light changes the look of your subject. Plus, if you're shooting any video, LEDs are a must.
- Choose Strobes if: You need maximum sharpness, want to freeze fast-moving subjects, and require the power to shoot in any lighting situation, especially bright sun.
- Choose LEDs if: You love seeing your lighting setup live, want the flexibility to shoot video, or work with subjects who might be sensitive to a bright flash, like babies.
At Candid Studios, we believe mastering light is the secret to telling a compelling story. Whether it's a wedding, a corporate event, or a family portrait, our team draws on years of experience to craft beautifully lit, timeless images. See how we bring moments to life by exploring our award-winning photography and videography services at Candid Studios.