How to Look Good on Camera: A Practical Guide for Photos and Video
How to Look Good on Camera: A Practical Guide for Photos and Video
When it comes to looking your best on camera, two things matter more than anything else: lighting and angles. If you can get a handle on how light hits your face and where you place the camera, you’ve already won half the battle. Everything else—your outfit, your hair, how you pose—is just building on that solid foundation.
Master Your On-Camera Foundation With Light And Angles
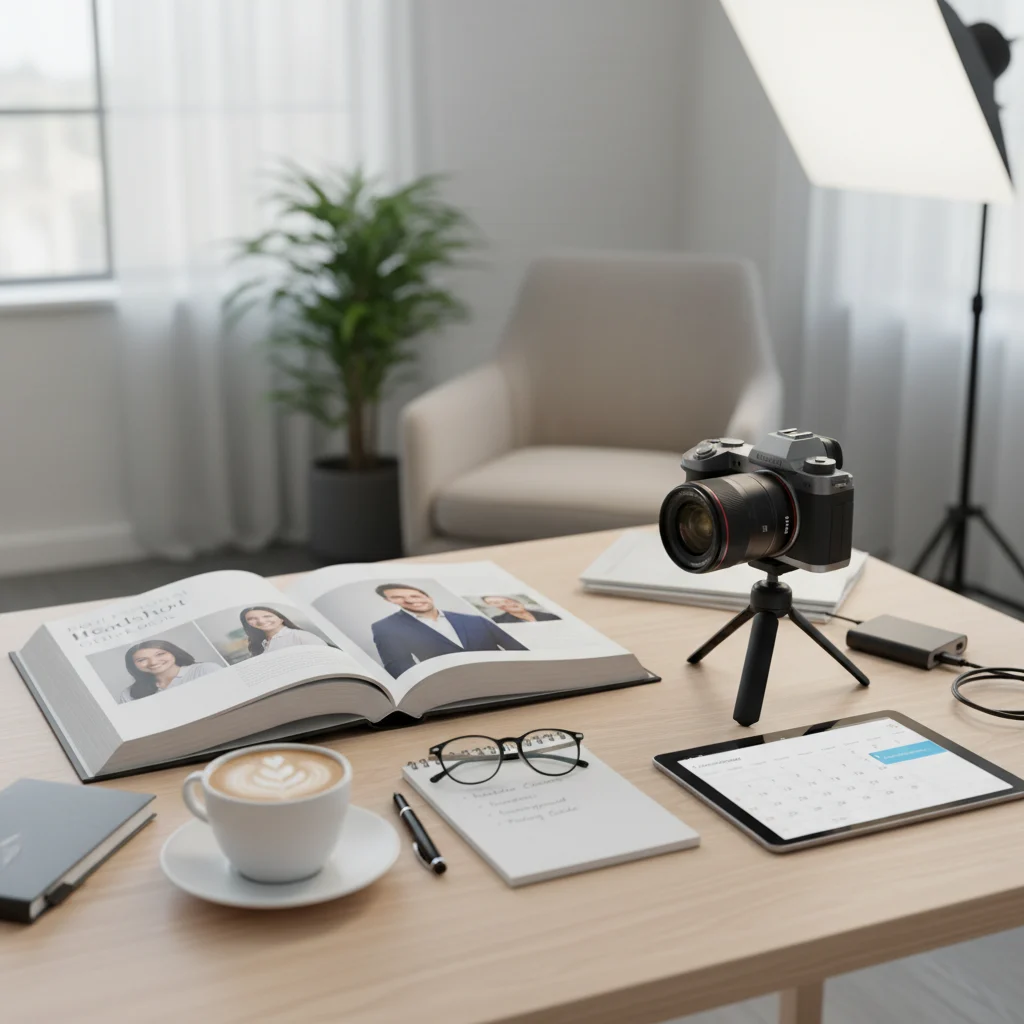
Before you even think about what to wear, your first job is to get your light and camera placement sorted. These two elements are what create shape, dimension, and definition, completely changing how your features look on screen. Honestly, a simple desk lamp and a well-positioned laptop can make a bigger difference than a brand-new outfit.
Think of light as a sculptor’s tool. It can carve out your best features or create unflattering shadows that add unwanted texture and make you look tired. In the same way, the camera’s angle can make you look long and lean or, from the wrong spot, create distortion and make things feel awkward. Getting this right isn't about knowing a bunch of technical jargon; it’s about understanding a few basic principles that anyone can master.
Why Lighting Is Your Most Powerful Tool
Good lighting isn't just a nice-to-have; it's the single biggest factor in whether you look good on camera. In fact, industry data often points to poor lighting as the number one reason for low-quality video. Even tiny tweaks can make a huge difference in how clear and flattering the final image is.
For example, cinematographers often place their main light at a 30–45 degree angle. Why? It preserves natural skin texture without creating those harsh, distracting shadows. This is why professionals obsess over lighting—they know it’s what separates an amateur shot from a polished one. The goal isn't to blast your face with light, but to shape it.
The most common mistake I see is people relying on overhead lighting. It’s a killer. It casts deep shadows under your eyes, nose, and chin, which flatters absolutely no one. The fix is simple: get your primary light source in front of you, not above you.
Key Takeaway: Always face your main light source. Whether it's a window, a ring light, or a lamp you grabbed from the living room, putting it directly in front of you fills in shadows and gives you a soft, even look that instantly brightens your face.
Harnessing The Power Of Angles
Camera placement is just as critical as lighting. The classic mistake? Placing the camera too low, so it’s looking up at you. This angle is famous for highlighting your chin and nostrils while throwing your proportions out of whack.
For a look that’s almost universally flattering, get that camera up to your eye level or even slightly above it. This simple adjustment subtly slims your face and neck, defines your jawline, and naturally encourages you to sit up straighter, which instantly makes you look more confident.
- Eye-Level: This feels direct and conversational. It creates a genuine connection with the person on the other side of the screen.
- Slightly Above Eye-Level: A classic portrait trick. It makes your eyes appear a little larger and gently sculpts the contours of your face for a more defined look.
This simple diagram shows how your light, camera, and you should all work together.

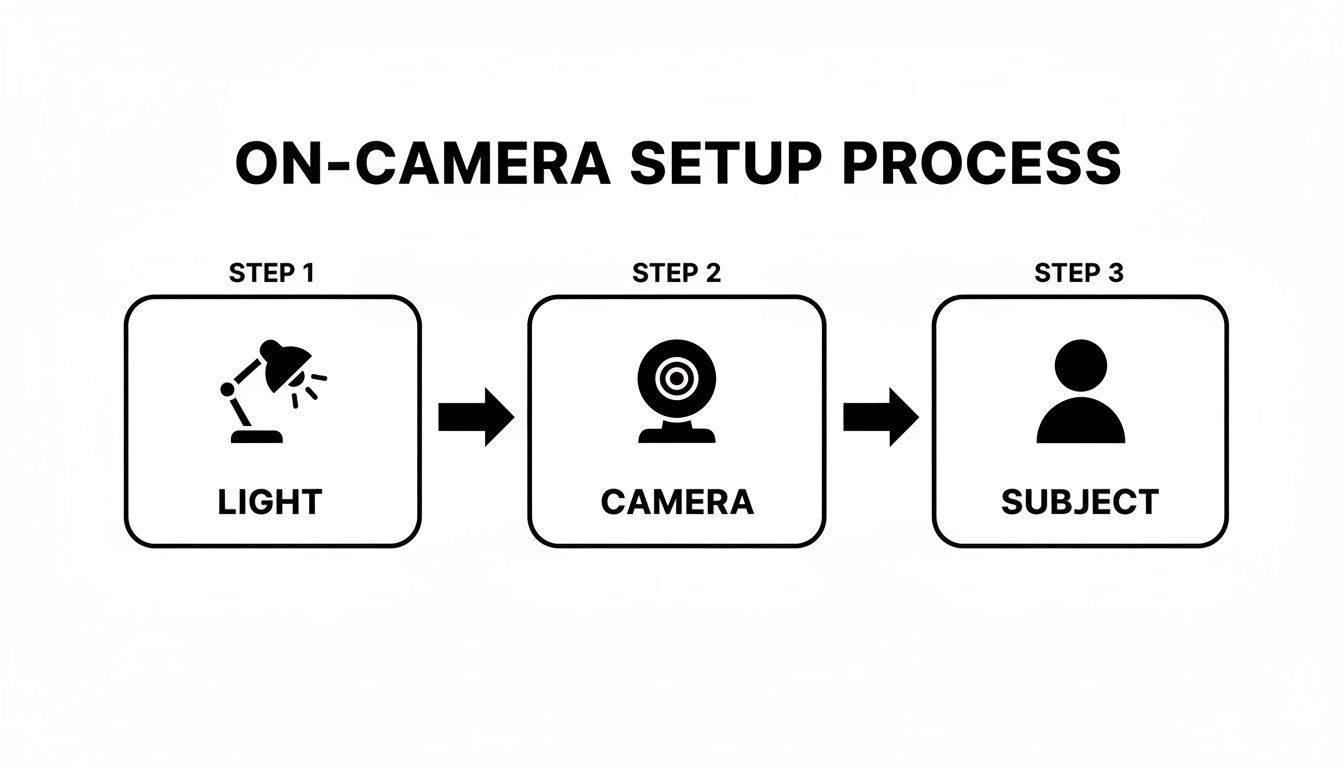
As you can see, the light hits you first, then the camera captures the image. That's why getting your lighting right is always the first step.
Getting these fundamentals right can feel like a game-changer. Here are a few quick adjustments you can make right now to see an immediate improvement.
Quick Lighting and Angle Fixes
Technique
Why It Works
How to Do It
Move to Face a Window
Natural light is soft and diffused, which minimizes harsh shadows and flatters skin tones.
Set up your desk or camera so you are facing a window. Avoid having the window directly behind you.
Elevate Your Camera
Placing the camera at or slightly above eye level creates a more slimming and defined look for the face and jawline.
Use a stack of books, a laptop stand, or a small tripod to raise your webcam or phone to the correct height.
Use a Reflector
Bounces light back onto your face to "fill in" shadows on the side opposite your main light source.
Hold a piece of white paper, foam board, or even a white pillow just out of the camera's frame to brighten up shadows.
Turn Off Overhead Lights
Overhead lights create deep, unflattering shadows under your eyes, nose, and chin.
Rely on light sources in front of you (like a window or lamp) and turn off any ceiling lights directly above you.
These small changes are often all you need to go from looking "okay" to looking fantastic on camera.
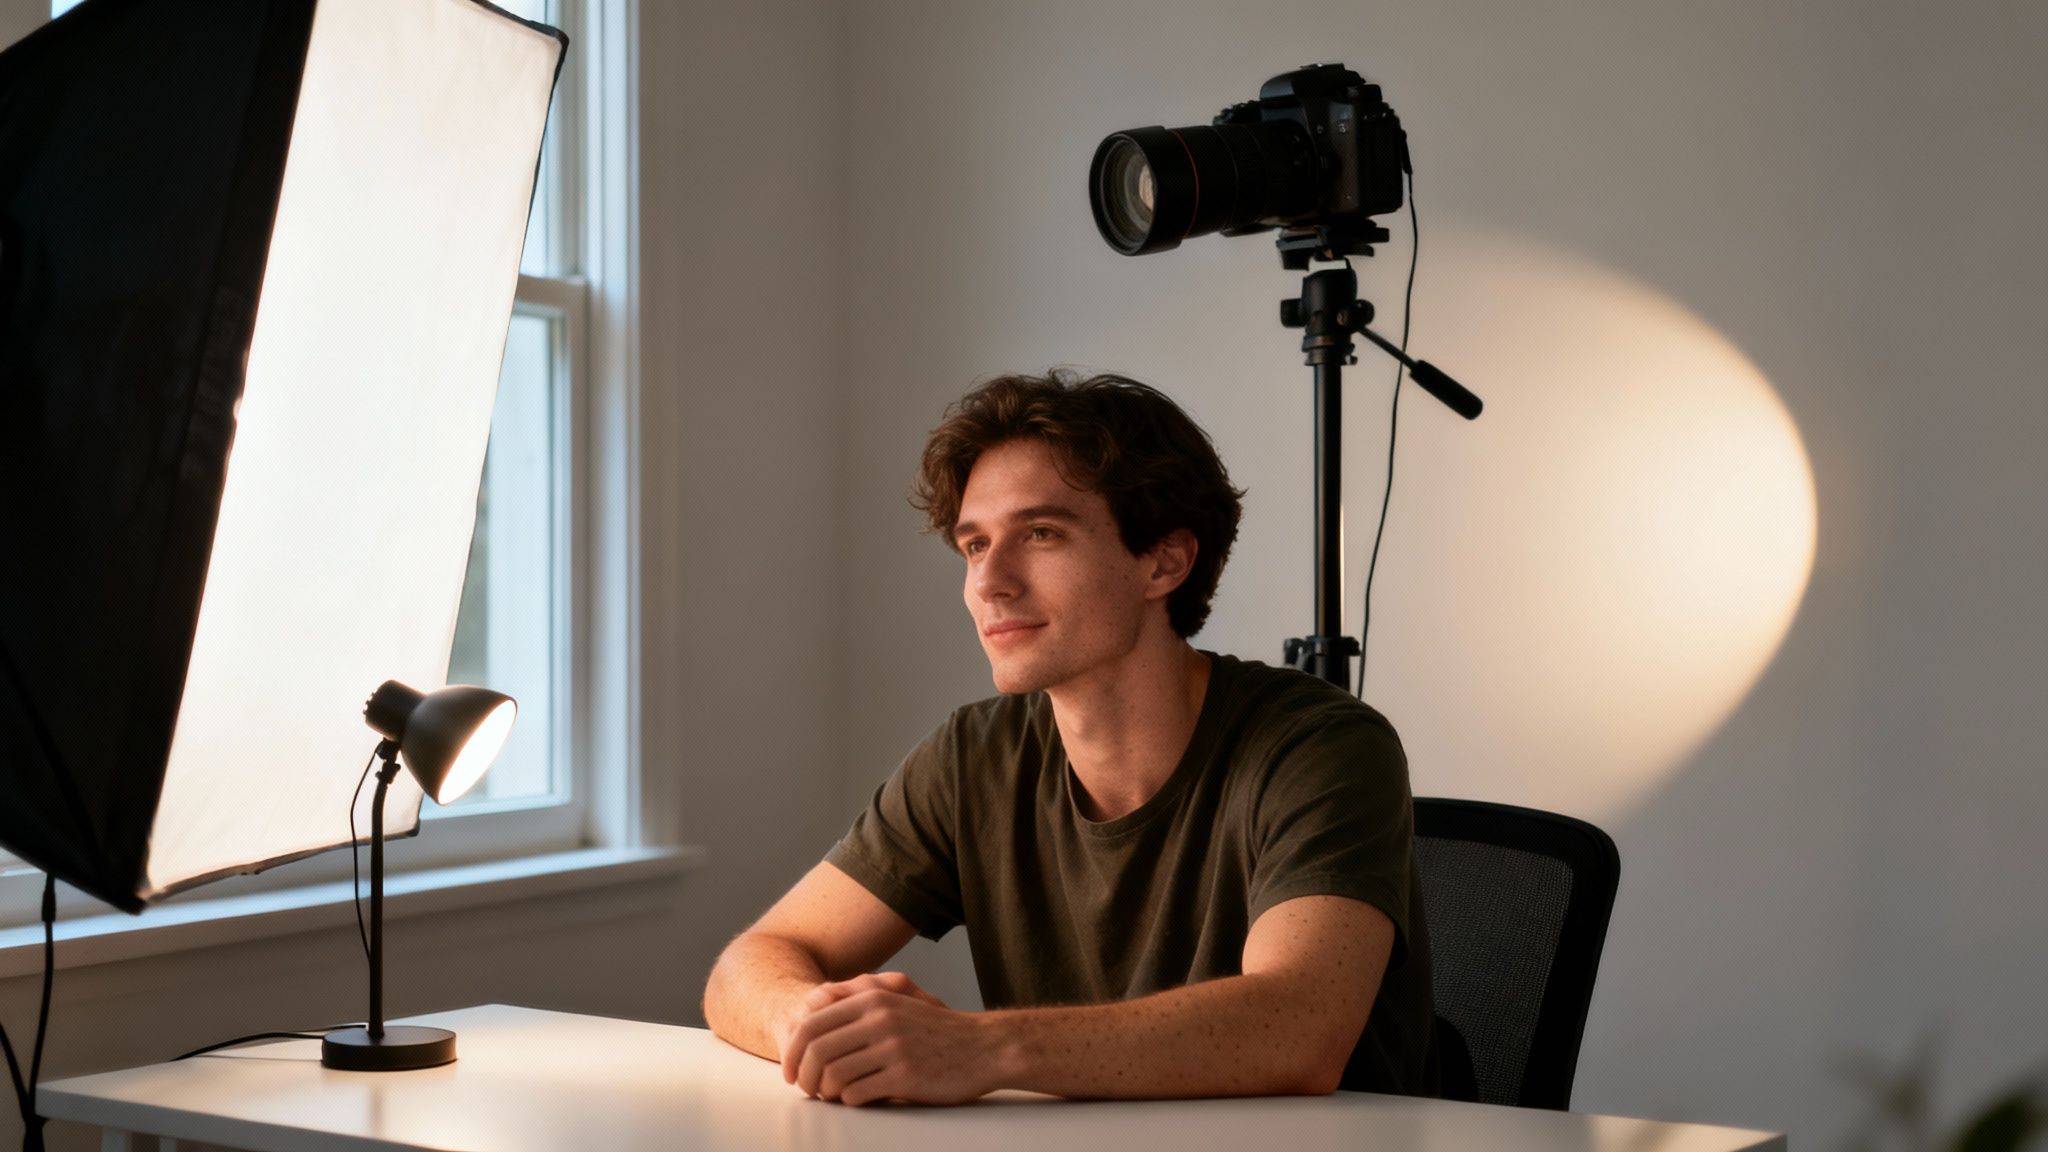
Creating A Simple DIY Lighting Setup
You absolutely do not need a professional studio to get great lighting. You can mimic a classic three-point system, which is the gold standard, using lamps you already have at home.
- Key Light: This is your main, brightest light. Place it about 45 degrees to one side of your face. A desk lamp or a ring light is perfect for this. It does most of the work illuminating you.
- Fill Light: This is a softer light placed on the opposite side. Its only job is to soften the shadows created by the key light. A lamp with a shade or one bounced off a white wall works wonders.
- Back Light: Placed behind you (out of the shot!), this light creates a subtle outline around your hair and shoulders, separating you from the background and adding a touch of professional polish.
Even if you only have one decent light source, like a window, you can use a reflector to act as your fill light. Just grab a piece of white foam board and hold it on the shadowed side of your face to bounce some of that window light back.
If you're ready to move beyond DIY and invest in some gear, you can explore our guide on the best lighting equipment for photography. By understanding how to shape light and find your best angles, you take control of how you appear, ensuring you always put your best self forward.
Choosing Your Wardrobe For On-Camera Success
What you wear is one of the most powerful tools you have to look and feel great on camera. The right outfit makes you feel confident and polished, but the wrong one can be a huge distraction. This isn’t about shelling out for expensive clothes; it’s about understanding what works with the camera, not against it.
An outfit that looks fantastic in person can sometimes do weird things on screen. Certain patterns, colors, and even fabrics can create visual noise that pulls focus away from you. The goal is simple: pick an outfit that lets you be the star of the show.
The Power Of Color And Simplicity
When in doubt, solid colors are your best friend. They create a clean, classic look that keeps the viewer’s attention right where it belongs: on your face. I’ve found that jewel tones—like sapphire blue, emerald green, and deep ruby reds—are universally flattering and really pop on camera.
Busy patterns, on the other hand, can be a nightmare. Tiny, tight patterns like thin stripes, small checks, or houndstooth can cause a distracting visual glitch called a moiré pattern. It looks like a wavy, shimmering effect on screen, and it’s incredibly distracting. If you’re a fan of patterns, just make sure they're big and bold enough for the camera to see them clearly.
Pro Tip: Try to steer clear of pure white and pure black. A bright white shirt can easily become the brightest object in the frame, tricking the camera into making your face look too dark. Pure black can swallow all the light, turning your outfit into an undefined blob. Instead, think about off-white, cream, charcoal gray, or navy.
Flattering Fits And Necklines
The way your clothes fit is just as important as the color. The first step is to know how to dress for your body type so you can play up your best features. Clothes that skim your body without being too baggy or skin-tight almost always look best on camera.
Your neckline is especially critical because it frames your face. Here are a few reliable choices:
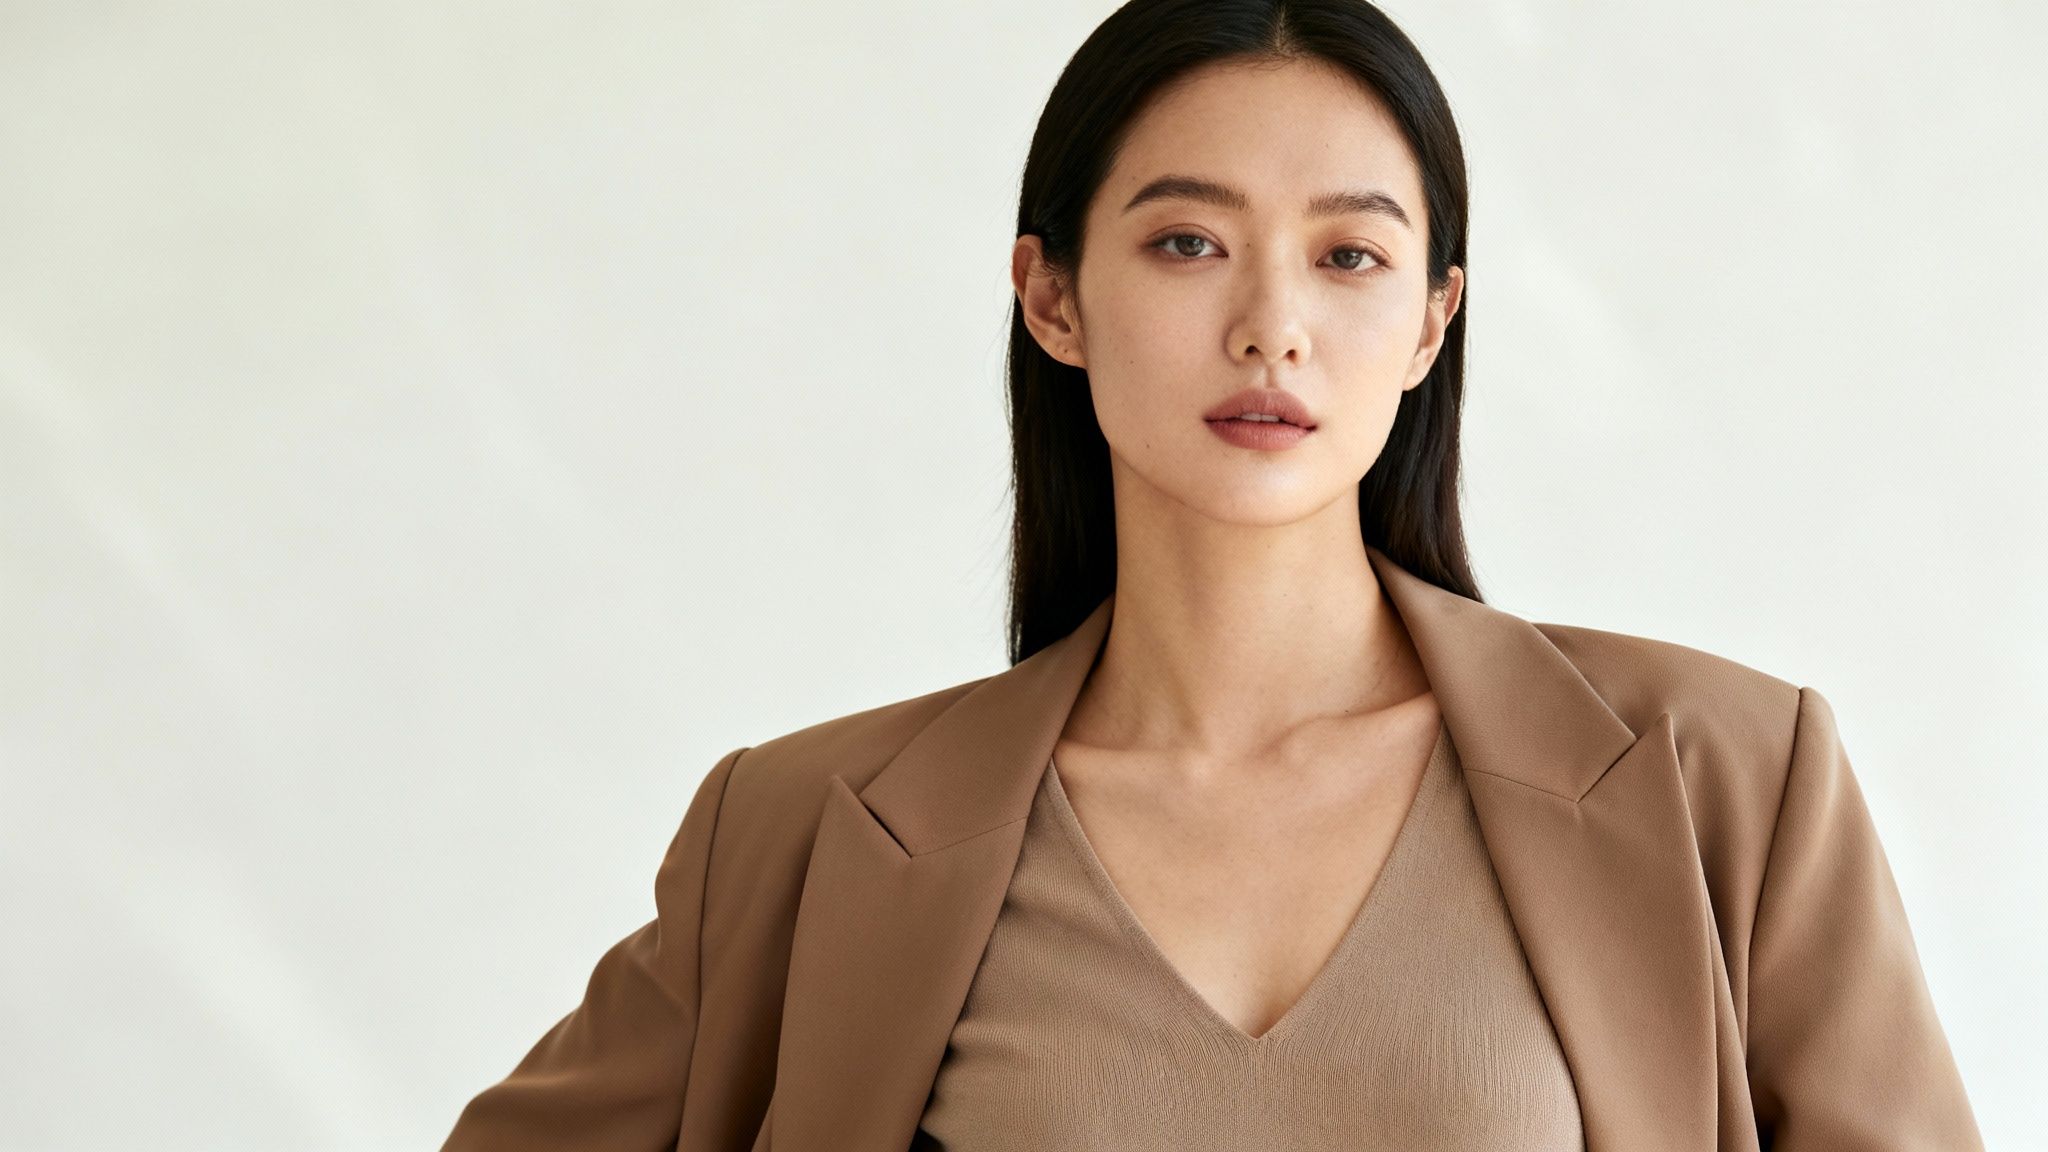
- V-Necks: These are great for creating a longer, leaner-looking neckline. They draw the eye downward in a really flattering way.
- Scoop Necks: A soft, rounded scoop neck is a classic for a reason. It opens up your collarbone area for an approachable look without being too revealing.
- Collared Shirts: A crisp collar or a structured blazer immediately adds a dose of authority and professionalism. They’re my go-to recommendation for corporate headshots or professional videos.
Ultimately, wear what makes you feel fantastic. Your confidence will shine through more than anything else.
Choosing The Right Fabrics
The material of your outfit matters more than you might think. Some fabrics just don’t play well with studio lights.
I always recommend fabrics that drape nicely and don’t wrinkle easily, like a good cotton blend, merino wool, or a matte jersey. They hold their shape and give you that clean, put-together appearance. Steer clear of anything too shiny, like satin or certain polyesters. They can catch the light and create distracting glares or hot spots.
And please, steam or iron your clothes before you arrive! Wrinkles that you can barely see in person become glaringly obvious under professional lighting. That one small step makes a world of difference. For a deeper dive, our guide on the best colors to wear on camera has even more specific advice.
Projecting Confidence Through Posture And Body Language
It’s completely normal to feel a little stiff or awkward in front of a camera. The moment that lens is pointed at you, it’s easy to freeze up. But the real secret to looking great on camera isn't about being perfect—it's about projecting confidence through your body. The way you hold yourself speaks volumes before you even say a word.
Your posture and body language are powerful, non-verbal cues that tell a story. Standing tall doesn’t just make you look better physically; it sends a message of authority, poise, and self-assurance. It's all about creating an open, inviting presence that makes people want to lean in and listen.
Master The Art Of Sitting And Standing
Whether you're sitting for a video call or standing for a portrait, your core posture is the foundation of it all. Start with a simple visualization: imagine a string is gently pulling the crown of your head toward the ceiling. This little trick helps you lengthen your spine, roll your shoulders back and down, and naturally engage your core.
This one adjustment instantly makes you appear more alert and composed. But then comes the classic question: what do I do with my hands? We’ve all been there. Instead of letting them hang awkwardly, give them a job.
- When Sitting: Gently rest your hands in your lap or on the table in front of you. Try to avoid fidgeting or clenching them into fists, as that can be a dead giveaway for nervousness.
- When Standing: Give your hands a natural anchor point. Try resting one hand in a pocket or holding a prop that makes sense, like a notebook or a coffee mug. This simple move prevents you from looking stiff.
These small adjustments make a huge difference in your overall presence. It’s not about being rigid, but about being mindful of how you carry yourself.
Create Dynamic Shapes With Your Body
One of the best tricks I've learned to avoid looking flat or one-dimensional is to create angles with your body. Standing or sitting straight-on to the camera often looks a bit confrontational or static, like a mugshot.
Instead, try turning your body about 45 degrees away from the camera and then turning your head back to face the lens. This slight twist creates a more dynamic silhouette, adds depth, and is almost universally flattering. It subtly slims your frame and makes the entire pose feel more engaging. This technique is a cornerstone of professional posing, and you can explore more advanced techniques in our guide on the art of full body model poses.
Takeaway: Always remember the "S-curve" principle. By creating gentle bends at your joints—a slight bend in an elbow, one knee softened more than the other—you introduce curves that look far more natural and relaxed than straight, rigid lines.
Connecting Through Expression And Eyeline
Your facial expression is arguably the most important piece of the puzzle. A genuine smile or a thoughtful expression can create an instant connection with your audience, but the key is authenticity. Ditch the forced "cheese" and instead, think of something that genuinely makes you happy or a person you love talking to. That feeling will travel all the way to your eyes, creating a natural warmth.
Direct eye contact with the lens is crucial for building trust, especially in videos. It's not just a feeling; research consistently shows that framing, posture, and eyeline have a significant impact on viewer engagement. In fact, many content teams find that face-centric framing with a direct eyeline can improve view-through rates by 10–30% compared to wider shots where the presenter's face is less prominent.
It can feel strange to talk to a small glass circle, but try to imagine you're speaking directly to a friend on the other side. This simple mindset shift helps your expressions become more natural and engaging, allowing you to build a real connection with your audience. By mastering your posture, movement, and expression, you can completely transform how you appear on camera and show the world the confident, authentic you.
Your Pre-Shoot Prep For A Polished Look

True on-camera confidence doesn't just switch on the moment the shutter clicks. It starts hours, or even a day, before you step in front of the lens. The small, intentional steps you take beforehand make a huge difference in how you look and, more importantly, how you feel. It’s not about becoming someone else; it’s about giving your natural self the best possible starting point to shine.
Think of it this way: a healthy, hydrated base makes everything easier. When your skin looks its best, the light hits your face more flatteringly, makeup goes on smoother, and you just feel more put-together. You don’t need an elaborate spa day, but a little focused care goes a surprisingly long way.
Skincare And Grooming Essentials
Your prep should really start the night before. This is the ideal time to focus on hydration and creating a smooth canvas. A simple hydrating face mask can work wonders to plump up your skin, while a gentle exfoliator will slough off any dry patches. The goal is a fresh, dewy surface.
On the day of your shoot, the routine is simple but crucial:
- Start with a clean face. Wash away any oil or impurities to create a perfect base.
- Moisturize, moisturize, moisturize. This is non-negotiable. Good moisturizer prevents that dry, flaky look under studio lights and ensures any makeup applies evenly.
- Don't forget lip balm. Chapped lips are incredibly distracting on camera. A good swipe of balm early on gives it time to work its magic.
If you’re not wearing makeup, these grooming details are even more important. Make sure your hair is styled intentionally, facial hair is neat (whether trimmed or clean-shaven), and eyebrows are tidy. These small things add up to a polished, professional appearance.
Taking the time for these small grooming steps is a form of mental preparation. It's a signal to yourself that you're stepping into a professional setting and are ready to present your best self.
For a deeper dive into getting ready, our complete guide on how to prepare for a photoshoot has you covered.
Camera-Ready Makeup Tips
Makeup for the camera plays by slightly different rules than your everyday look. HD cameras see everything, so the name of the game is subtle enhancement, not a heavy transformation. Your main goal should be creating an even, matte base that won't reflect light and cause unwanted shine.
The T-zone—your forehead, nose, and chin—is usually the first culprit for oiliness. A quick dusting of translucent powder here can be a lifesaver, keeping you looking fresh throughout the session.
From there, focus on gentle definition. A swipe of mascara helps open up your eyes, and a bit of brow pencil can powerfully frame your face. If you're new to creating that flawless base, learning how to apply foundation for beginners is a fantastic starting point. Ultimately, you just want to look like the best, most well-rested version of yourself.
Simple Camera Settings That Make a Big Difference
You don't have to be a technical whiz to get your camera working for you. While things like great lighting and smart angles are the foundation, a few simple tweaks in your camera settings can totally change how you look on screen.
Let's cut through the jargon. You only need to get a handle on two key ideas—focal length and aperture—to start creating much more flattering and professional-looking images. This isn't about memorizing a user manual; it's about knowing which buttons to push to get the look you want.
Why Your Lens Choice Matters (A Lot)
Ever take a selfie and think your nose looks… bigger? You’re not imagining it. That’s the effect of focal length. Measured in millimeters (mm), focal length basically determines how "zoomed in" your view is and how it distorts (or flatters) features.
Short focal lengths, like the default wide-angle lens on your phone, are notorious for causing distortion when you get too close. It’s why your face can look a bit warped in close-up selfies. For portraits, longer is almost always better.
- 35mm – 50mm: This is the “normal” range. It’s close to what our own eyes see, so it renders faces naturally without much funky distortion. It’s a great choice for lifestyle or environmental portraits where you want to show a bit of the scene around you.
- 85mm – 135mm: Now we’re talking. This is the classic sweet spot for portraits. These longer lenses compress the background, making it feel closer and creating that beautiful separation that makes you pop. More importantly, they have a subtle slimming effect on facial features that is incredibly flattering.
If you’re on a smartphone, you can get a similar effect. Just switch to "Portrait Mode" or use the 2x or 3x optical zoom. It’s a simple trick that instantly makes a huge difference.
A Quick Look at How Lenses Shape Your Face
To really see what I mean, let’s break down how different focal lengths can completely change the look of a face. What you choose can either exaggerate features or create a more balanced, pleasing portrait.
Lens Focal Length and Its Effect on Portraits
Focal Length Range
Common Use
Visual Effect on Subject
Best For
16mm – 35mm (Wide-Angle)
Landscapes, group shots, real estate
Can distort features, making noses and foreheads appear larger, especially up close.
Capturing a wide scene; generally unflattering for tight headshots.
50mm (Standard)
Street photography, environmental portraits
Renders features naturally, similar to human vision. Minimal distortion.
Natural, true-to-life portraits that include some background context.
85mm – 135mm (Telephoto)
Classic portraits, headshots
Compresses features for a slimming, flattering look. Separates subject from background.
Creating classic, professional-looking portraits with beautiful background blur.
As you can see, simply changing your lens or your zoom level is one of the most powerful tools you have. An 85mm lens is a portrait photographer's best friend for a reason.
Get That Dreamy, Blurry Background
The other secret weapon in your toolkit is aperture. Think of it as the pupil of your camera's lens. It opens and closes to let in more or less light, and we measure it in "f-stops" (like f/1.8, f/4, etc.).
But aperture does more than just control brightness—it also dictates your depth of field, which is just a fancy way of saying how much of your photo is in focus.
A low f-stop number (like f/1.8 or f/2.8) means the opening is wide, which creates a very shallow depth of field. This is how you get that gorgeous, blurry background effect photographers call bokeh. It melts away distracting backgrounds and puts all the focus squarely on you.
Your equipment really comes into play here. A camera with a big full-frame sensor paired with a lens that has a wide aperture (like f/1.4) can capture way more light and create a much creamier background blur than a tiny smartphone sensor ever could. It’s a key reason professional photos often have that polished, high-end feel. For a deeper dive, check out the latest market trends for camera lenses and see how the tech is evolving.
Your Quick-Check Settings Before You Shoot
Before you even think about pressing the shutter button, run through this quick mental checklist. It’ll make sure your gear is set up to make you look your best.
- Pick the Right Focal Length: On a DSLR or mirrorless camera, grab a lens somewhere between 50mm and 85mm. Using your phone? Pop it into Portrait Mode or use the 2x zoom.
- Open Up Your Aperture: Set your camera to the lowest f-stop number your lens can handle (f/1.8, f/2.8, etc.). This will give you that nice background blur.
- Nail the Exposure: Your photo should be bright, but not so bright that you lose details in the highlights (what we call "blown out"). If a shot ends up too bright, don't panic; you can often learn how to fix overexposed photos in post-production.
- Set Your White Balance: Skin tones are everything. Make sure they look natural by setting your white balance to match your light source (Daylight, Shade, Tungsten, etc.). "Auto" is pretty good these days, but a manual setting is always more accurate. This prevents you from looking too orange or blue.
Common Questions About Looking Good On Camera
Even when you've done all the prep work—you’ve picked the perfect outfit, dialed in the lighting, and practiced your poses—a few last-minute questions can still pop up. I get it. Those little details can make all the difference.
So, let's tackle some of the most common worries I hear from clients. Think of this as your personal cheat sheet for handling those nagging concerns right before the camera starts rolling.
How Can I Stop Looking So Nervous On Camera?
First off, it's completely normal to feel a little anxious. The secret isn't to eliminate the nerves but to manage them so they don't show. My go-to trick is simple: breathe. Before you start, take three slow, deep breaths. In through your nose, out through your mouth. It sounds basic, but it’s incredibly effective at calming your nervous system down.
Another thing that works wonders is to change how you see the camera. Instead of viewing it as a cold, intimidating piece of glass, imagine you're talking to a good friend. Picture them right on the other side of the lens. This small mental shift can instantly soften your expression and make you seem more relaxed and engaging.
And don't forget to move! If you feel yourself tensing up, just shake it out. Gently shake your hands, roll your shoulders, do a little stretch. This physical release breaks up that stiff, deer-in-the-headlights look and helps you settle into a more natural posture.
What Is The Best Way To Hide Blemishes?
A surprise blemish can feel like a disaster, but it’s an easy fix. The golden rule here is that less is more. Piling on makeup will only draw more attention to it.
Start by making sure your face is clean and moisturized. This is key because it stops concealer from clinging to dry skin, which is a dead giveaway.
Next, grab a high-coverage concealer that’s a perfect match for your skin tone. Using a tiny brush or even a clean pinky finger, apply just a dot directly onto the spot. Then, gently pat and feather the edges to blend it seamlessly into the skin around it.
Pro Tip: Once the concealer is blended, lock it in with a whisper-light dusting of translucent powder. This not only keeps it in place but, more importantly, mattifies the area so it doesn't catch the light and reveal your secret.
How Do I Keep My Video From Looking Shaky?
Shaky footage is one of the fastest ways to make a video look amateurish. The easiest fix? Stabilize your camera. You don’t need anything fancy; even a small, inexpensive tripod for your phone or camera will make a huge difference.
If you absolutely have to shoot handheld, use your body as a tripod. Tuck your elbows firmly into your sides and hold the camera with both hands. This simple technique creates a much more stable base and cuts down on those distracting little jitters.
For those with newer gear, don't forget to check your settings. Many modern cameras have incredible in-body stabilization. A lot of Sony cameras, for instance, have "Active" or "Dynamic Active" modes that are lifesavers for smoothing out movement, especially if you're walking and talking.
Where Should I Look When I Am On Camera?
This is a big one because your eyeline is how you connect with your audience. For almost any situation where you're speaking to viewers—like a vlog, a course video, or a social media update—you want to look directly into the camera lens.
I know, it feels weird at first. Your instinct is to look at yourself on the flip-out screen. Don’t do it! Looking at the screen makes you look shifty and disconnected. Looking straight into the lens is the equivalent of making eye contact, and it builds an immediate sense of trust and connection.
The only exception is if you're in an interview or an on-camera conversation with someone else. In that case, your focus should be on the person you're talking to. This creates a natural, authentic dynamic that's far more interesting for people to watch.
At Candid Studios, we believe that feeling confident on camera starts with having a team that makes you feel comfortable and guided. We specialize in capturing your authentic story, whether it's for a wedding, a family portrait, or a commercial project.
Ready to create something beautiful together? Learn more about our approach and book your session.